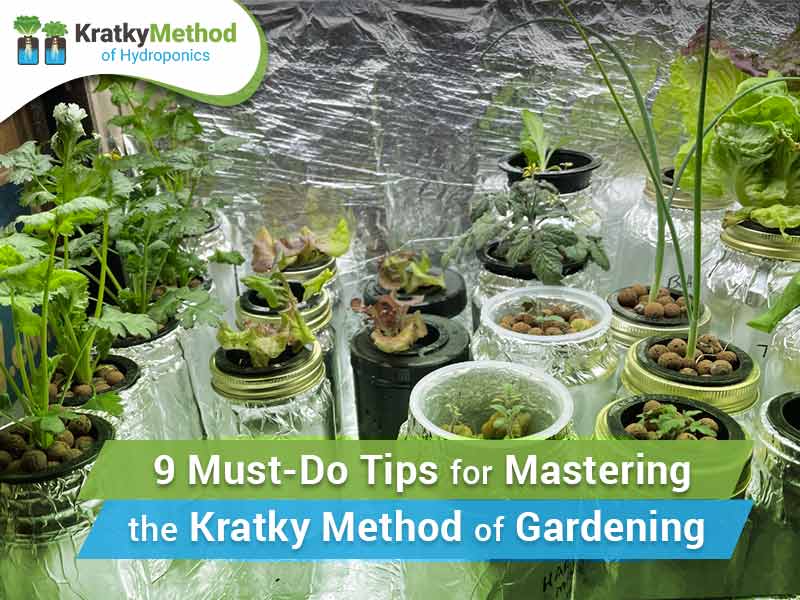
One of the most enjoyable hobbies I have is growing delicious fruits, vegetables and flowers in my hydro garden. Nothing beats fresh picked tomatoes, paired with fresh sprigs of basil. Or flavorful cilantro on my tacos, picked 10 minutes before dinner. When I first started, I did not know a whole lot and learned the hard way, like everyone else. Along the way, I picked up some tips that may help you in your efforts.
9 Tips to Create a Highly Productive Kratky Method Garden
1. Don’t overthink it – keep it simple
t’s very easy to start overthinking every decision you make, whether it is about the amount of nutrient solution or the size of container you will use. Sometimes the best way to learn is to simply do. When I first started, I did not even have nutrients. I used tap water and did not test it. And guess what happened? Things grew and I was able to harvest fresh foods from my garden. As I became more proficient, I started to care more about what I was doing and getting better at it. This yielded a larger crop usually, so it is worth learning. But I still recommend at first, keep it simple!
2. Stagger your planting for just-in-time harvesting
I love lettuce and can eat quite a bit, so planting a ton at once serves me well. However, I cannot eat gobs of green onions. in fact, I rarely eat much, just a cutting here or there. So planting everything the same day is not smart. Instead, think about staggering your plantings. For things I eat a lot of, I’ll start a new seedling every week. But for things that I don’t use quite as much, I may only plant once every 2-3 weeks. This ensure I have only what I need and there is no waste, both of the plants and my growing space.
3. Get a good grow light and put it on a timer to shorten growing time
The first time I tried growing with hydroponics, I tried using natural light by a window. It just did not go well. My house has a lot of porch and overhangs, with very little direct light. My seeds grew leggy and things did not go well. For indoor gardening, you should invest in a good grow light and timer. This will allow your plants to get maximum light and grow faster and more abundantly. I have two shelves running normally and have a timer for each light, so I can adjust and group my crops that need more or less light together.
4. Monitor water levels
There is nothing worse than growing something for 1, 2 or 3 months and then losing the crop because you neglected to check water levels. Thinks can go south quickly if water-thirsty plants suck up the last bit of moisture in the jar. Check water levels frequently or ensure you use the right size container with extra space for more water.
5. Select plants and varieties you will actually enjoy growing and eating
For years I grew a lot of green onions. They are fun and easy to grow, but I simply do not eat that many of them. So they would grow and grow until I eventually just threw them away. I now know what I will and won’t eat and how much of it. I only grow what I will actually consume or enjoy, in the case of flowers.
6. Look for micro, dwarf or tiny varieties if growing indoors
The first time I grew tomatoes, I did not consider the space I had. My plants grew tall and quickly overtook the space, blocking light to everything else. After some research, I found some varieties that grew small and tight, allowing me to grow in a small space. There are wonderful smaller versions of just about everything these days.
7. Harvest often
One year, I grew 20 heads of many varieties of lettuce. At the same time. My garden looked amazing but I watched it grow and grow, without harvesting too much. I am not sure if I was “saving it” or what, but by the time everything was getting big, I could not eat it fast enough and some went to waste. I should have been harvesting much sooner. I could always grow more.
8. Purchase supplies that give you more enjoyment
When I first started, I would try and make net cups by saving pudding cups and other food-grade containers. I cut styrofoam from my grocery packaging to act as covers to block light (you can see many of these DIY things in the site and I may even make some videos down the road). In the end, I did not really enjoy doing those things though and was not happy with the disheveled look it gave my garden. I eventually purchased some professional supplies which not only saved me time, they just made my setup look so much better. The few bucks I would spend were worth every penny. Most of those things have lasted for years, so well worth the investments.
9. Seek out fellow enthusiasts and spare the uninterested
Your friends and family are passionate about eating your spoils but don’t want to know a thing about how they came to be. When I would share my passion and knowledge about my growing methods, I would get bored stares. No one wanted to come look at my setup. It was a lonely hobby…. until I joined a couple of Facebook groups and found my people. Now I go online and talk about my hobby and post pictures. I enjoy looking at others photos.
That’s about all I can think of for now. I simply love everything about the Kratky method and enjoy growing.
